


")
")
")
")


Baler Knowledgebase / FAQ
The baler knowledge base considered as baling machine dictionary, provides our world wide customers very convenient database for answers and information sharing about hydraulic baling press machines especially waste recycling baler and other related waste compactors and recycling industry information. Sinobaler is here ready to service you through our yearly accumulated technical experience and huge internal database.
A fully automatic horizontal baler is a high-performance recycling machine designed for continuous feeding, automatic compression, and automatic tying of recyclable materials such as cardboard, paper and plastics. Correct installation and setup are essential for safe operation, stable performance, and long-term efficiency.
This FAQ guide explains the full installation process, commissioning steps, safety requirements, and after-sales support to help you successfully set up your system and maximize ROI.
1. What Are the Basic Requirements Before Installing a Fully Automatic Horizontal Baler?

Before installation, you should prepare:
- Adequate factory space for the baler, conveyor, and bale output zone
- Reinforced concrete foundation to support heavy-duty operation
- Stable 3-phase industrial power supply (customized per machine model)
- Feeding system such as belt conveyor, air conveyor, or pit feeding system
- Forklift or crane access for unloading and positioning
For high-capacity systems from SINOBALER, precise floor leveling and proper layout planning are critical to ensure smooth automatic feeding and stable compression cycles.
2. How Is a Fully Automatic Horizontal Baler Installed Step by Step?
Step 1: Site Preparation
- Clean and level the installation area
- Confirm concrete foundation curing (typically 15–30 days)
- Mark machine layout and conveyor alignment positions
Step 2: Machine Positioning

- Lift and position the baler using forklift or crane
- Align main baler body with feeding conveyor system
- Ensure sufficient space for bale discharge and handling
Step 3: Anchoring the Equipment
- Fix the baler frame to the foundation using anchor bolts
- Verify horizontal and vertical alignment
- Tighten all structural connections
Step 4: Conveyor & Feeding System Setup

- Install infeed conveyor system
- Connect hopper and feeding chute
- Adjust sensors and overload protection devices
Step 5: Hydraulic System Preparation

- Fill hydraulic oil to recommended level
- Check oil cleanliness and filtration system
- Inspect all hoses, fittings, and pressure connections
Step 6: Electrical System Installation

- Connect main power supply
- Install PLC control cabinet
- Test wiring, grounding, and safety circuits
- Verify emergency stop functionality
3. How Do You Commission a Fully Automatic Horizontal Baler?
Commissioning ensures the machine operates safely and efficiently.
Dry Run (No Material)
- Check motor rotation direction
- Run full compression cycle without load
- Test automatic tying system and sensors
Load Testing
- Feed light materials such as cardboard or plastic film
- Gradually increase feeding volume
- Monitor bale formation and tying stability
Full Production Testing
- Run continuous operation for 2–4 hours
- Adjust pressure, cycle time, and feeding speed
- Confirm consistent bale size and density
4. What Safety Checks Are Required During Setup?
Before full operation, verify:
- Emergency stop buttons function correctly
- Safety interlock doors are active
- Hydraulic pressure is within safe limits
- Electrical grounding is properly installed
- Overload protection system is enabled
- Operators are trained before startup
⚠️ Never operate the baler without completing full safety validation.
5. How Long Does Installation Take?
Installation time depends on system complexity:
- Standard horizontal baler: 3–5 days
- Fully automatic system with conveyor: 4–7 days
- Large integrated recycling line: 7–15 days
6. Can a Fully Automatic Baler Be Installed in Existing Facilities?

Yes. Fully automatic horizontal balers are commonly installed in:
- Recycling plants (MRF facilities)
- Paper mills and packaging factories
- Plastic recycling centers
- Warehouses and logistics hubs
Integration may require conveyor customization and layout adjustments to match existing workflows.
7. Who Should Perform Installation?
Installation should be completed by:
- Manufacturer’s technical engineers
- Qualified mechanical and electrical technicians
- On-site facility engineers under supervision
Professional installation ensures safety, performance stability, and warranty protection.
8. What Support Is Provided After Installation?
After installation, manufacturers typically provide:
- On-site commissioning and testing
- Remote technical support and troubleshooting
- Spare parts supply and maintenance guidance
- Operator training and documentation
Installation & Training Service by SINOBALER
Our team at SINOBALER provides complete installation and setup services for fully automatic horizontal balers, ensuring every system is correctly commissioned for stable and efficient operation.
We also provide professional training for your staff to ensure they are fully familiar with the operation, safety procedures, and daily maintenance of the baler. This helps reduce downtime, improve productivity, and extend machine service life.
9. What Are Common Installation Mistakes to Avoid?
Avoid these common issues:
- Uneven or weak foundation causing vibration
- Incorrect hydraulic oil type or contamination
- Misaligned conveyor feeding system
- Wrong electrical phase connection
- Skipping dry-run testing before loading material
- Improper configuration of safety interlocks
10. Why Proper Installation Matters for ROI
A correctly installed system ensures:
- Higher bale density and stable output
- Lower maintenance and downtime costs
- Improved energy efficiency
- Longer machine lifespan
- Maximum production capacity
Proper setup directly improves profitability and long-term operational reliability.
Once the bale has been fully ejected from the baler chamber, the next critical step is safe and efficient handling. Proper movement ensures operator safety, maintains bale integrity, and keeps your recycling workflow smooth.
✔ Step 1: Assess the Bale Condition
Before moving, check that the bale is:
- Fully tied and secured (wire, straps, or bands)
- Stable and not loosening at the edges
- Placed on a flat and safe surface
Never attempt to move an unstable bale.
✔ Step 2: Select the Right Handling Equipment
Choose the correct tool based on bale weight and material:
- Forklift (Recommended for heavy-duty bales)


Best for cardboard, plastic, metal, and high-density bales. Use fork extensions or a bale clamp for better grip.
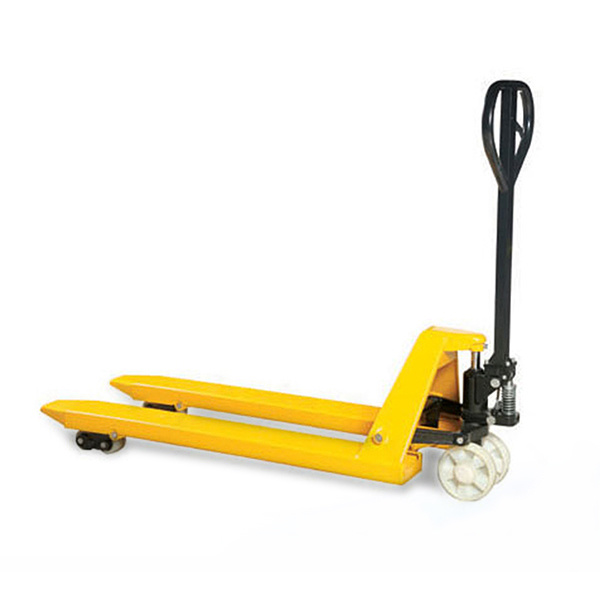
- Pallet Jack (For light to medium bales)
- Bale Clamp / Bale Grabber (Most secure option)

✔ Step 3: Lift and Transport Carefully
- Approach the bale slowly and align equipment properly
- Lift only after ensuring stable contact with the bale
- Avoid sudden movements or sharp turns
- Keep load low during transport for better stability
✔ Step 4: Place the Bale in Storage or Loading Area
- Stack bales evenly to prevent tipping
- Maintain clear pathways in storage zones
- Separate different material types if required
- Ensure dry conditions to preserve bale quality
✔ Step 5: Follow Safety Best Practices
- Keep personnel clear of moving equipment
- Never exceed forklift load capacity
- Inspect lifting equipment regularly
- Train operators on bale handling procedures
Upgrade Your Bale Handling Efficiency with SINOBALER
If your facility struggles with slow or unsafe bale handling, SINOBALER can help with:
- Heavy-duty horizontal balers with automatic discharge
- Conveyor-based bale ejection systems
- Integrated bale handling solutions for high-volume recycling plants
👉 Improve safety and productivity with a smarter baling workflow.
✅ Request Solution | FAQ | Request Layout Design | Watch Demo
Reduce Energy Costs with the Right Baler Choice
Electricity consumption is a key concern for recycling facilities, warehouses, and manufacturing plants. Understanding how much power a baler uses helps businesses reduce operating costs and improve efficiency.
Modern balers are designed to maximize compression force while minimizing energy waste, making them a cost-effective solution for waste management.

How Much Electricity Does a Baler Use?
Baler power consumption varies depending on size, capacity, and design:
- Vertical balers: 3 kW – 30 kW
- Semi-automatic horizontal balers: 4 kW – 45 kW
- Fully automatic balers: 15 kW – 60+ kW
⚡ Important note:
Balers do not operate at full power continuously. Electricity is mainly consumed during hydraulic compression cycles, not during idle time.
What Affects Baler Electricity Consumption?
Several factors influence energy usage:
1. Material Type
Cardboard, plastics, textiles, and metals require different compression forces.
2. Machine Size & Tonnage
Higher tonnage machines use more power but process larger volumes per cycle.
3. Operating Frequency
More frequent cycles increase total energy consumption.
4. Automation Level
Fully automatic systems use conveyors and sensors, increasing base consumption slightly.
5. Hydraulic System Efficiency
Modern hydraulic systems reduce energy loss and improve performance.
Do Higher Capacity Balers Always Use More Electricity?
Not necessarily. While large balers have higher motor ratings, they often:
- Process more material per cycle
- Reduce total operating time
- Improve energy efficiency per ton
This means higher capacity machines can actually be more cost-efficient in high-volume operations.
How to Reduce Baler Electricity Costs
To optimize energy usage, follow these best practices:
✔ Select the right baler size for your workload
✔ Avoid frequent start-stop operation
✔ Maintain hydraulic oil quality and system pressure
✔ Use energy-efficient motors
✔ Train operators for optimal cycle timing
Monthly Electricity Cost Example
Example calculation:
- Motor power: 15 kW
- Operation: 6 hours/day
- Working days: 25 days/month
Estimated consumption:
👉 ~2,250 kWh/month
Actual cost depends on local electricity rates and usage patterns.
Energy-Efficient Baling Solutions
Modern equipment such as those from SINOBALER Machinery is engineered for:
- Low energy consumption hydraulic systems
- High-efficiency compression cycles
- Smart idle mode operation
- Durable industrial-grade motors
These features help reduce electricity costs while maintaining high productivity.
Why Energy Efficiency Matters in Recycling Operations
Lower electricity consumption leads to:
- Reduced operating costs
- Higher profit margins
- Lower carbon footprint
- Improved long-term machine ROI
Choosing the right baler is not just about capacity—it’s about long-term efficiency.
Get the Right Baler for Your Facility
If you want to reduce electricity costs and improve recycling efficiency, selecting the correct baler configuration is essential.
👉 Contact us to get a customized baler solution based on your material type, capacity needs, and budget.
✅ Request Solution | FAQ | Request Layout Design | Watch Demo
Why Textile Waste Requires Specialized Baling Equipment
Textile waste requires specialized compression equipment because fabrics are soft, elastic, and difficult to compact efficiently. Recycling facilities, garment factories, and used clothing exporters commonly choose between a common vertical baler and a lifting chamber baler. While vertical balers offer economical volume reduction, lifting chamber balers produce cleaner, export-quality textile bales that improve handling efficiency and resale value.
With global textile recycling expanding rapidly, selecting the correct baling solution directly impacts labor cost, logistics efficiency, and overall recycling profitability.
What Is a Common Vertical Baler?
A common vertical baler, also called a downstroke baler, compresses material using a hydraulic ram moving vertically from top to bottom.
How It Works
Operators load textile waste into the chamber, and the ram compresses materials repeatedly until the desired bale density is reached. The bale is then tied manually and ejected.
Advantages for Textile Scrap
- Low investment cost
- Compact machine footprint
- Multi-material capability
- Suitable for small and medium recyclers
- Simple installation and operation
Limitations When Handling Used Clothing
Soft textile fibers expand after compression, which may cause:
- Deformed bale shape
- Increased labor during wrapping
- Lower resale appearance
👉 Vertical balers are ideal for textile offcuts, fabric scraps, and waste reduction applications.
What Is a Lifting Chamber Baler?
A lifting chamber baler is specially engineered for compressing soft recyclable materials such as clothing, rags, towels, and mixed textiles.
How It Works
Instead of ejecting the bale, the compression chamber lifts upward after pressing, leaving the finished bale on the base platform for easy tying and wrapping.
Benefits for Textile Recycling Operations
- Designed specifically for textile materials
- Easy bale tying and bagging
- Uniform square bale shape
- Higher bale presentation quality
- Improved export and resale value
Industries commonly using lifting chamber balers include:
- Used clothing exporters
- Textile recycling plants
- Charity sorting centers
- Second-hand clothing traders
Common Vertical Baler vs Lifting Chamber Baler: Key Differences
| Feature | Common Vertical Baler | Lifting Chamber Baler |
|---|---|---|
| Compression Method | Downward ram | Chamber lifting system |
| Textile Compatibility | Good | ⭐ Excellent |
| Bale Appearance | Standard | Export quality |
| Wrapping Efficiency | N/A | Very easy |
| Investment Cost | Lower | Medium |
| Best Application | Waste reduction | Textile resale/export |
Which Baler Is Best for Different Types of Textile Waste?
Textile Factory Offcuts
Garment manufacturing generates loose cutting scraps that mainly require volume reduction.
✅ Recommended: Vertical Baler
Used Clothing Recycling Centers
Facilities sorting reusable clothing need clean, uniform bales suitable for resale markets.
✅ Recommended: Lifting Chamber Baler
Charity & Donation Organizations
Manual labor efficiency and easy bale handling are critical.
✅ Recommended: Lifting Chamber Baler
Textile Export Businesses
Export containers require dense, well-wrapped bales to maximize shipping efficiency.
✅ Recommended: Lifting Chamber Baler
How the Right Baler Increases Textile Recycling Profits
Choosing the correct baler delivers measurable economic benefits:
Reduced Transportation Costs
Higher bale density means more textiles per container shipment.
Improved Bale Quality
Professional bale appearance increases buyer confidence and resale pricing.
Labor Savings
Easy tying and unloading reduce operator workload and improve productivity.
Faster Container Loading
Uniform bale dimensions simplify stacking and logistics planning.
Key Factors to Consider Before Choosing a Textile Baler
Before investing in textile baling equipment, evaluate:
- Daily processing capacity
- Desired bale weight (40–500 kg typical)
- Available installation space
- Operator availability
- Export market requirements
- Material type (scrap vs reusable clothing)
A correct equipment match ensures long-term operational efficiency.
Recommended Textile Baling Solutions from SINOBALER
As an experienced manufacturer of recycling machinery, SINOBALER provides customized textile waste baling solutions for global recyclers.
Typical solutions include:
- Vertical textile balers for factory waste reduction
- Lifting chamber balers for used clothing export
- Bagging balers for small textile bales
- Semi-automatic and automatic textile baling systems
- Complete textile recycling and container loading solutions
Engineering consultation helps customers select machines based on real production requirements rather than machine size alone.
Frequently Asked Questions About Textile Waste Balers
Which baler is best for used clothing?
A lifting chamber baler is typically preferred because it produces uniform, easy-to-wrap export bales.
Can vertical balers compress textile waste efficiently?
Yes. Vertical balers work well for fabric scraps and non-resale textile waste where appearance is less important.
What bale weight is ideal for clothing export?
Most exporters prefer textile bales between 80–450 kg depending on container loading strategy.
Why are lifting chamber balers popular in textile recycling?
They simplify bale removal, improve wrapping efficiency, and maintain bale shape after compression.
Real Textile Recycling Application Examples
- Garment factory compressing cutting waste for disposal savings
- Used clothing exporter shipping second-hand apparel overseas
- Charity organization preparing donation textiles for redistribution
- Recycling facility improving warehouse space utilization
These real applications demonstrate how proper baler selection directly improves operational efficiency.
Choosing the Right Baler for Maximum Textile Recycling Efficiency
Both machines play important roles in textile waste management:
✅ Vertical Baler — Best for economical textile waste volume reduction
✅ Lifting Chamber Baler — Best for reusable clothing, resale, and export markets
Understanding your material type, production volume, and business objective is the key to selecting the most profitable baling solution.
👉 For customized textile recycling solutions, consult SINOBALER engineers to determine the ideal baler configuration for your operation.
✅ Request Solution | FAQ | Request Layout Design | Watch Demo

Efficient container loading directly impacts freight cost, export efficiency, and project profitability.
With high-density compression technology from SINOBALER, exporters can significantly increase tons per container and reduce transportation cost per ton.
This practical guide explains how to calculate container loading for compressed bales used in recycling, biomass, and agricultural export industries.
🚢 1. Standard Shipping Container Specifications
| Container Type | Internal Size (L×W×H) | Volume | Max Payload |
|---|---|---|---|
| 20ft Container | 5.9 × 2.35 × 2.39 m | ~33 CBM | 24–28 Tons |
| 40ft Container | 12.03 × 2.35 × 2.39 m | ~67 CBM | 26–28 Tons |
| 40ft High Cube (40HQ) | 12.03 × 2.35 × 2.69 m | ~76 CBM | 26–28 Tons |
✅ In most high-density baling projects, container weight limit is reached before volume limit — which is exactly why powerful balers matter.
📏 2. Bale Size & Density — The Core of Loading Efficiency
Container loading depends mainly on:
✔ Bale Dimensions
Example SINOBALER export bale:
- Length: 1200 mm
- Width: 1100 mm
- Height: 1100 mm
✔ Bale Weight
Example:
- 1020 kg per bale
✔ Compression Density
High compression from SINOBALER automatic balers allows exporters to ship more material per container.
| Material | Typical Density |
|---|---|
| OCC Cardboard | 350–450 kg/m³ |
| PET Bottles | 300–400 kg/m³ |
| Textile Waste | 350–500 kg/m³ |
| Alfalfa Hay | 220–320 kg/m³ |
| RDF / SRF Fuel | 450–650 kg/m³ |
🧮 3. Container Loading Calculation Formula
Step 1 — Calculate Bale Volume
Bale Volume=Length×Width×Height
Example:
1.2×1.1×1.1=1.452 m3
Step 2 — Calculate Maximum Bale Quantity (By Volume)
Container Volume÷Bale Volume
Example for 40HQ container:
76÷1.452≈52 bales
Step 3 — Check Container Weight Limit ⭐ (Most Important)
Container Payload÷Bale Weight
Example:
28,000kg÷1020kg≈27 bales
👉 Actual loading quantity = 27 bales (weight limited)
📊 4. Example — SINOBALER Export Loading Comparison
| Compression Level | Bale Weight | Bales / 40HQ | Total Shipment Weight |
|---|---|---|---|
| Low Density | 250 kg | 80–90 | ~22 Tons |
| Medium Density | 350 kg | 70–75 | ~25 Tons |
| SINOBALER High Density | 450–550 kg | 55–65 | 26–28 Tons ✅ |
💡 Higher compression = Lower shipping cost per ton.
🚜 5. Recommended Loading Method
✔ Flat layer stacking
✔ Cross stacking for stability
✔ Forklift loading from container rear
✔ Minimal gaps between bales
✔ Uniform bale size (important advantage of SINOBALER automatic balers)
High-density rectangular bales produced by SINOBALER horizontal balers are specially designed for export container optimization.
🌍 6. Industries Using SINOBALER Container Loading Solutions
- Recycling facilities (OCC, plastic, textile)
- Waste-to-energy RDF producers
- Alfalfa hay exporters
- Biomass fuel suppliers
- Cotton & fiber exporters
- Industrial waste management companies
💰 7. Why Compression Directly Increases Export Profit
Using high-pressure SINOBALER balers helps exporters:
✅ Increase tons per container
✅ Reduce freight cost per ton
✅ Improve storage efficiency
✅ Simplify customs & logistics handling
✅ Standardize international shipments
📌 Quick Calculation Formula
You can use below simple rule:
Container Load (tons) = Bale Weight × Number of Bales
or
Bales per Container = Container Payload ÷ Bale Weight
✅ Request Solution | FAQ | Request Layout Design | Watch Demo
Hauling and transportation are among the largest operating expenses for waste management companies. Rising fuel costs, labor shortages, vehicle maintenance, and landfill tipping fees make transportation efficiency a critical profitability factor.
Leading operators reduce hauling costs by improving waste density, logistics efficiency, and automation — areas where SINOBALER baling solutions play an important role.
1️⃣ Increase Material Density Through Baling


The most effective strategy is simple:
👉 Move more material with fewer truckloads.
Loose recyclables contain large air space. Trucks often reach volume capacity long before weight limits.
How SINOBALER Helps
High-density balers compress materials into transport-ready bales:
- OCC cardboard
- PET bottles
- Plastic films
- Packaging waste
- Mixed recyclables
Benefits
- Reduce volume by 80–90%
- Fewer transportation trips
- Lower fuel consumption
- Reduced driver hours
- Improved trailer utilization
2️⃣ Install Balers at Transfer Stations & Recycling Facilities

Instead of hauling loose waste long distances, companies compact materials at centralized locations.
Typical Workflow
Collection → Transfer Station → SINOBALER Baling System → Full Truckload Shipping
This approach dramatically reduces transportation frequency and operational costs.
3️⃣ Recover Valuable Recyclables Before Transport
Transporting mixed waste directly to landfill is expensive.
Modern waste management companies:
✔ Sort recyclables early
✔ Bale commodities onsite
✔ Sell recovered materials
Dense bales produced by SINOBALER systems improve handling efficiency and market acceptance by recyclers and mills.
4️⃣ Optimize Collection Routes & Fleet Efficiency
Transportation optimization includes:
- GPS routing systems
- Smart pickup scheduling
- Fill-level monitoring
- Reduced idle time
- Balanced truck loading
When combined with baling, optimized routing delivers maximum hauling savings.
5️⃣ Reduce Handling & Labor Through Automation
Manual waste handling increases costs and slows operations.
Automated baling systems from SINOBALER help by:
- Continuous conveyor feeding
- Automatic tying systems
- Reduced manual compaction
- Faster loading cycles
- Consistent bale production
Less handling means faster processing and lower labor cost per ton.
6️⃣ Use Standardized High-Density Bales
Uniform bales allow:
- Faster forklift handling
- Stable stacking
- Safe trailer loading
- Maximum container utilization
SINOBALER horizontal balers are designed to produce consistent bale sizes suitable for domestic and export transportation.
7️⃣ Ship Directly to Recycling End Users
Many waste operators lower hauling costs by shipping baled materials directly to:
- Paper mills
- Plastic recyclers
- Metal processors
High-quality bales produced by SINOBALER equipment meet industry transport and recycling standards, minimizing rehandling costs.
8️⃣ Implement Integrated Waste Processing Systems


Advanced facilities combine:
Sorting → Conveying → Shredding → Baling → Storage → Transportation
SINOBALER provides balers that integrate easily into automated recycling lines, helping waste companies operate more efficiently at scale.
✅ Results Achieved with Proper Baling Solutions
Waste management companies commonly achieve:
- 30–60% fewer hauling trips
- Significant fuel savings
- Reduced labor requirements
- Increased recycling revenue
- Faster facility throughput
- Lower environmental footprint
Conclusion
Reducing hauling costs is not only about transportation — it starts with efficient waste processing before shipment. By increasing material density, improving logistics planning, and adopting automated baling solutions from SINOBALER, waste management companies transform transportation from a major expense into a strategic operational advantage.
✅ Get Quote | Ask Engineer | Installation Serive | Video Demo
Installing a steel chain conveyor with a ground pit feeding system is a common solution in modern recycling, shredding, and baling plants.
This FAQ page answers the most frequently asked questions from plant managers, engineers, and installation teams.

1. What is a Ground Pit Feeding Steel Chain Conveyor?
A ground pit feeding system means the conveyor inlet is installed below floor level inside a civil foundation pit.
This allows materials to be:
- Loaded directly from the ground
- Fed by loaders or manual operation
- Transferred continuously to downstream equipment
Typical applications include:

2. Why Must a Pit Be Prepared Before Installation?
The pit is essential because it allows the feeding inlet to sit flush with the ground surface.
Benefits include:
✅ Easy ground-level feeding
✅ Reduced lifting equipment use
✅ Improved safety for operators
✅ Higher feeding efficiency
✅ Better plant layout integration
Without a pit, operators would need ramps or elevated platforms.
3. How Deep Should the Installation Pit Be?
The pit depth depends on:
- Conveyor model
- Chain height
- Hopper structure
- Required feeding angle
General guideline:
The feeding opening should align with finished floor height.
👉 Always follow the manufacturer’s foundation drawing for exact dimensions.

4. How Is the Steel Chain Conveyor Installed Into the Pit?
Installation steps normally include:
- Lift conveyor using crane or forklift
- Slowly lower feeding inlet into pit
- Align conveyor centerline with downstream equipment
- Adjust height and horizontal level
- Fix anchor bolts securely
⚠️ Avoid twisting or uneven lifting to protect chain alignment.

5. Should the Conveyor Inlet Be Level With the Ground?
Yes — this is critical.
The inlet should be:
- Flush with the ground surface
- Accessible for loaders or manual feeding
- Free from gaps that may trap materials
Correct positioning ensures materials can be directly thrown or pushed into the conveyor.

6. What Equipment Is Commonly Connected After the Conveyor?
Steel chain conveyors typically feed:
- Industrial shredders
- Horizontal balers
- Sorting systems
They function as the primary automatic feeding solution.
7. What Are Common Installation Mistakes?
Common issues include:
❌ Incorrect pit dimensions
❌ Feeding inlet higher than ground level
❌ Poor leveling causing chain deviation
❌ No drainage design
❌ Misalignment with shredder or baler
Proper planning avoids costly reinstallation.
✅ Get Quote | Download Brochure | Ask Engineer | Video Demo
Wood shavings and wood chips are widely generated in sawmills, pallet recycling plants, furniture factories, biomass processing facilities, and woodworking workshops. Because these materials are lightweight, loose, and dusty, feeding them efficiently into a bagging baler is one of the most important factors affecting productivity.
This guide explains the best methods, equipment configurations, and feeding systems for achieving stable, automatic, and high-efficiency wood waste bagging.
Why Proper Feeding Matters in Wood Waste Bagging
Unlike cardboard or plastic waste, wood shavings and chips:
- Have low bulk density
- Flow inconsistently
- Easily bridge or clog feeding openings
- Generate airborne dust
- Require continuous feeding instead of batch loading
Without a proper feeding system, operators often face:
✅ Material blockage
✅ Uneven bale weights
✅ Low bagging output
✅ Increased labor cost
✅ Dust pollution issues
A correctly designed feeding solution ensures stable compression and automatic bag filling.
Recommended Feeding Methods for Wood Shavings & Chips
1. Cyclone Feeding System (Best Solution)


The cyclone feeding system is the most efficient way to feed lightweight wood materials.
Working Principle
- Wood shavings are transported through air ducts.
- A cyclone separator removes air from materials.
- Wood material drops directly into the bagging baler hopper.
- Continuous feeding enables automatic bagging.
Advantages
- Continuous automatic feeding
- Dust control improvement
- No manual loading
- High feeding efficiency
- Ideal for sawdust & fine shavings
👉 Widely used with SINOBALER wood shavings bagging baler with cyclone feeding system.
2. Screw Conveyor Feeding


A screw conveyor (auger) is suitable for controlled feeding applications.
Best For
- Medium-density wood chips
- Short conveying distance
- Stable material size
Benefits
- Accurate feeding control
- Compact layout
- Simple automation integration
Consideration
Very light shavings may require pre-compaction or cyclone assistance.
3. Belt or Chain Conveyor Feeding

For high-capacity facilities, conveyors provide reliable material transport.
Recommended For
- Pallet recycling plants
- Wood shredding lines
- Continuous production lines
Advantages
- Handles large volumes
- Integrates with shredders
- Fully automatic operation
Often paired with a wood pallet shredder/granulator → conveyor → bagging baler system.
Typical Wood Shavings Bagging Process Flow
Standard Process Flow
Wood Waste
→ Shredding / Milling
→ Cyclone Separation
→ Storage Hopper
→ Automatic Feeding
→ Bagging Baler Compression
→ Finished Biomass Bags with Sealing Machine
This workflow allows continuous biomass packaging with minimal labor.
Key Design Considerations for Feeding Wood Materials
✔ Material Type
- Fine sawdust → cyclone system
- Wood shavings → cyclone or screw conveyor
- Large chips → conveyor feeding
✔ Moisture Content
Recommended: 10–18% moisture for stable compression.
✔ Hopper Design
- Large inlet opening
- Anti-bridging structure
- Level sensor for automation
✔ Dust Control
Cyclone + dust collector greatly improves workplace safety.
Common Feeding Problems & Solutions
| Problem | Cause | Solution |
|---|---|---|
| Material bridging | Low density | Use cyclone feeding |
| Uneven bag weight | Manual feeding | Install automatic conveyor |
| Dust pollution | Airborne particles | Add cyclone separator |
| Low efficiency | Batch loading | Continuous feeding system |
Why Choose SINOBALER Wood Shavings Bagging Baler
SINOBALER provides a complete biomass bagging solution, not just a baler.
Key Advantages
- Integrated cyclone feeding system
- Continuous automatic bagging
- Stable bale weight control
- Reduced labor requirement
- Designed for wood shavings, sawdust & biomass fuel materials
- Compatible with PROSINO shredding systems
Ideal industries include:
- Sawmills
- Pallet recycling plants
- Biomass fuel production
- Furniture manufacturing
- Animal bedding production
Conclusion
Efficient feeding is the foundation of successful wood shavings and wood chips bagging. By combining cyclone feeding, conveyors, or screw systems with a reliable bagging baler, recycling facilities can achieve:
✅ Continuous operation
✅ Cleaner working environment
✅ Higher bagging output
✅ Lower operating costs
A properly engineered feeding solution transforms loose wood waste into valuable packaged biomass products ready for storage, transport, and resale.
✅ Get Quote | Download Brochure | Ask Engineer | Video Demo
Materials Most Likely to Cause Baler Jams
Baler jams most commonly occur when processing hard and dense recyclable materials such as:
- Cardboard (OCC)
- Books
- Newspaper
- Magazines
- Thick paper waste
These materials create higher resistance during compression, especially in horizontal balers, where continuous feeding and automatic operation require smooth material flow.
Common Real-World Causes of Horizontal Baler Jams
Below are the most common real-world causes of horizontal baler jams and practical solutions used by recycling plants.
1. Previously Baled Cardboard Fed Into the Baler Again
Primary cause of serious jams.
Sometimes finished cardboard bales or heavily pre-compressed materials are accidentally fed back into the baler.
Why this causes jams
- Baled cardboard density is extremely high
- The cutting system cannot break it apart
- Material blocks the compression channel
- Ram pressure spikes suddenly
Solution
✅ Never feed finished bales back into the machine
✅ Install clear operator procedures
✅ Add feeding supervision or conveyor inspection
👉 Horizontal balers are designed for loose materials, not already compacted bales.

2. Hydraulic Cylinder Oil Leakage
Hydraulic performance directly determines whether the baler ram moves smoothly.
What happens when oil leaks
- Hydraulic pressure drops
- Ram loses compression force
- Material stops moving forward
- Waste accumulates and blocks chamber
Typical symptoms
- Slow ram movement
- Weak compression force
- Machine stops mid-cycle
Solution
✅ Inspect cylinder seals regularly
✅ Check oil level daily
✅ Repair leakage immediately
✅ Maintain stable hydraulic pressure
3. Dull or Worn Cutting Knife
Horizontal balers processing cardboard and books rely heavily on sharp cutting knives.
Why knife condition matters
Hard materials like books and magazines must be cut before compression.
When the knife becomes dull:
- Cardboard cannot be sheared cleanly
- Material folds instead of cutting
- Feeding resistance increases
- Chamber blockage occurs
Solution
✅ Inspect knife sharpness regularly
✅ Sharpen or replace worn blades
✅ Follow preventive maintenance schedule
👉 A sharp knife significantly reduces baler load and prevents jams.
Why Horizontal Balers Jam More with Hard Materials
Hard paper materials create:
- Higher friction
- Greater compression resistance
- Increased cutting demand
- Continuous feeding pressure
Therefore, cardboard horizontal balers require stricter maintenance and operation control compared with soft material baling.

Quick Troubleshooting Checklist
| Problem | Likely Cause | Action |
|---|---|---|
| Material stuck in channel | Baled cardboard fed again | Remove blockage & retrain operators |
| Weak compression | Cylinder oil leakage | Repair hydraulic system |
| Feeding resistance | Dull cutting knife | Sharpen or replace blade |
Best Practices to Prevent Horizontal Baler Jams
✔ Feed only loose cardboard or paper
✔ Monitor hydraulic system daily
✔ Maintain sharp cutting knives
✔ Train operators on proper feeding rules
✔ Schedule preventive maintenance
Facilities following these practices typically reduce downtime dramatically and extend baler service life.
Prevent Baler Jams with SINOBALER Solutions
A reliable horizontal baler is key to keeping your recycling operations smooth and efficient. SINOBALER offers high-performance horizontal balers specifically designed for cardboard, books, magazines, and other hard paper materials.
With features like robust cutting knives, strong hydraulic systems, and easy-to-maintain components, SINOBALER balers help prevent jams, reduce downtime, and improve throughput.
✅ Explore SINOBALER Horizontal Balers – the smart choice for professional cardboard and paper recycling.
✅ Contact SINOBALER for expert advice, spare parts, or preventive maintenance support to keep your balers running jam-free.
✅ Get Quote | Download Brochure | Ask Engineer | Video Demo
Why Proper Feeding Matters
Improper feeding can cause:
- Low bale density
- Machine jams
- Reduced productivity
- Safety risks
- Increased maintenance cost
The correct feeding method depends on cardboard volume, facility layout, and baler type.
Step-by-Step Feeding Process
Step 1 — Cardboard Preparation
- Remove plastic straps
- Flatten boxes when possible
- Avoid metal contamination
- Separate oversized cartons
Step 2 — Sorting & Staging
- Use collection cages or bins
- Keep feeding area clean
- Prevent mixed waste
Step 3 — Feeding the Baler
- Load evenly
- Do not overfill chamber
- Keep materials below safety line
Step 4 — Compression Cycle
- Close door properly
- Start compression cycle
- Repeat feeding until full bale
Popular Cardboard Baler Feeding Methods
Choosing the right feeding method is essential for achieving stable operation, high bale density, and efficient cardboard recycling.
Depending on waste volume and facility layout, cardboard balers are commonly fed using manual feeding, excavator feeding, or conveyor feeding systems.
1️⃣ Manual Feeding — Flexible & Cost-Effective

Best for:
- Retail stores
- Supermarkets
- Small warehouses
- Low to medium cardboard volume
How it works
Operators manually load flattened cardboard into the baler chamber.
Advantages
- Low investment cost
- Simple installation
- Easy operation
- Minimal space requirement
Considerations
- Requires operator labor
- Not suitable for continuous high-volume recycling
👉 Typically used with vertical cardboard balers.
2️⃣ Excavator Feeding — Heavy-Duty Bulk Handling

Best for:
- Recycling centers
- Waste transfer stations
- Large OCC accumulation areas
- Outdoor recycling yards
How it works
An excavator grabs and feeds loose cardboard directly into the baler feed opening or hopper.
Advantages
- Handles large volumes quickly
- Suitable for loose or bulky cardboard piles
- Reduces manual labor dramatically
Considerations
- Requires sufficient working space
- Best matched with heavy-duty horizontal balers
👉 Ideal solution when cardboard arrives in bulk loads.
3️⃣ Conveyor Feeding — Continuous & Automated Operation

Best for:
- Distribution centers
- E-commerce warehouses
- Manufacturing plants
- High-output recycling lines
How it works
Cardboard waste is transported automatically via conveyor belts into the baler for continuous compression.
Advantages
- Continuous feeding
- Stable production efficiency
- Reduced labor cost
- Supports automation integration
Considerations
- Higher initial investment
- Requires layout planning
👉 Commonly used with semi-automatic or fully automatic horizontal balers.
Feeding Method Comparison
| Feeding Method | Capacity | Labor Requirement | Automation Level | Typical Application |
|---|---|---|---|---|
| Manual | Low–Medium | High | Low | Retail / Warehouse |
| Excavator | High | Medium | Medium | Recycling Yard |
| Conveyor | Very High | Low | High | Industrial Facilities |
How to Choose the Right Feeding Method
Your ideal feeding system depends on:
- Daily cardboard volume
- Available labor
- Facility layout
- Automation goals
- Budget planning
👉 A properly matched feeding method can improve baling efficiency by 30–50%.
✅ Request Free Cardboard Baler Layout Consultation
🟦 Common Feeding Mistakes
❌ Feeding unflattened boxes randomly
❌ Mixing plastic and cardboard
❌ Overloading chamber
❌ Feeding wet cardboard excessively
❌ Ignoring material distribution
🟦 Safety Guidelines During Feeding
- Never reach into chamber during cycle
- Follow safety interlock systems
- Train operators regularly
- Stop machine before maintenance
Safety content increases professional credibility.
Get Your Custom Cardboard Baler Feeding Solution from SINOBALER
SINOBALER cardboard balers support manual and fully automatic feeding solutions tailored to different recycling operations.
👉 View Cardboard Baler Solutions
Ask us!
Don’t see the question you are looking for? Ask us!
Media and Gallery
Follow us


PRIVACY POLICY
We collect information from you when you fill out an inquiry or contact form. When submitting the form on our site, you may be asked to enter your name and contact details such as: e-mail address, mailing address and/or phone number, etc. Alternatively, you can choose not to complete our forms and visit our site anonymously. Any of the information we collect from you may be used to help us to better respond to your individual needs, and/or enable us to more effectively respond to your customer service requests and support needs. The email address you provided may also be used to send you information and updates pertaining to your inquiry and/or order, in addition to receiving occasional company news, updates, related product or service information, etc. SINOBALER does not sell, trade, or otherwise transfer to outside parties your personally identifiable information. This does not include trusted third parties who assist us in operating our website, conducting our business, or servicing you, so long as those parties agree to keep this information confidential. We may also release your information when we believe release is appropriate to comply with the law, enforce our site policies, or protect ours or others rights, property, or safety.
By using our site, you consent to our online privacy policy. If we decide to change our privacy policy, we will post those changes on this page. If you have any questions or concerns regarding our privacy policy, please e-mail info@sinobaler.com or mail your question to us at 1206 Yinzhou Shanghui Nan Lou, 1299 Yinxian Avenue, Yinzhou District, Ningbo 315192, P.R. China.
EXTERNAL LINKS & DISCLAIMER
Our web site has links to many other organizations with their permission. Upon leaving the SINOBALER web site, you are subject to the privacy policy of the new site which are not under our control. SINOBALER is not responsible for the content of any linked site or any link contained in a linked site. These links are provided to you as a service for you to better understand the different business relationships that SINOBALER has established, and/or to point the reader to other possible relevant resources.